Import contacts from Salesforce to Nunify
Activate Import Contact Integration
1. From the event dashboard, goto Settings.

2. Click "Import Contacts" under Salesforce in Integrations.

3. Click "Activate" to act

4. Click on "Copy" to copy the url. This will be used in Step 11 below.

Create an outbound message in Salesforce
5. Login to your salesforce dashboard from https://login.salesforce.com.
6. Open Setup

7. Click on Quick Find and search for Outbound Messages.

8. Click on Outbound Messages under Workflow Actions.

9. Click on New Outbound Message.

10. Select "Contact" as the Object and click on the Next Button.

11. Enter "Export contacts to Nunify" as the Name. The Unique Name should get filled automatically. Paste the URL that you copied in Step 4 in the Endpoint URL field.

12. Make sure "Id" is included in the Selected Fields and click on "Save".

Setup a flow to send contact to Nunify
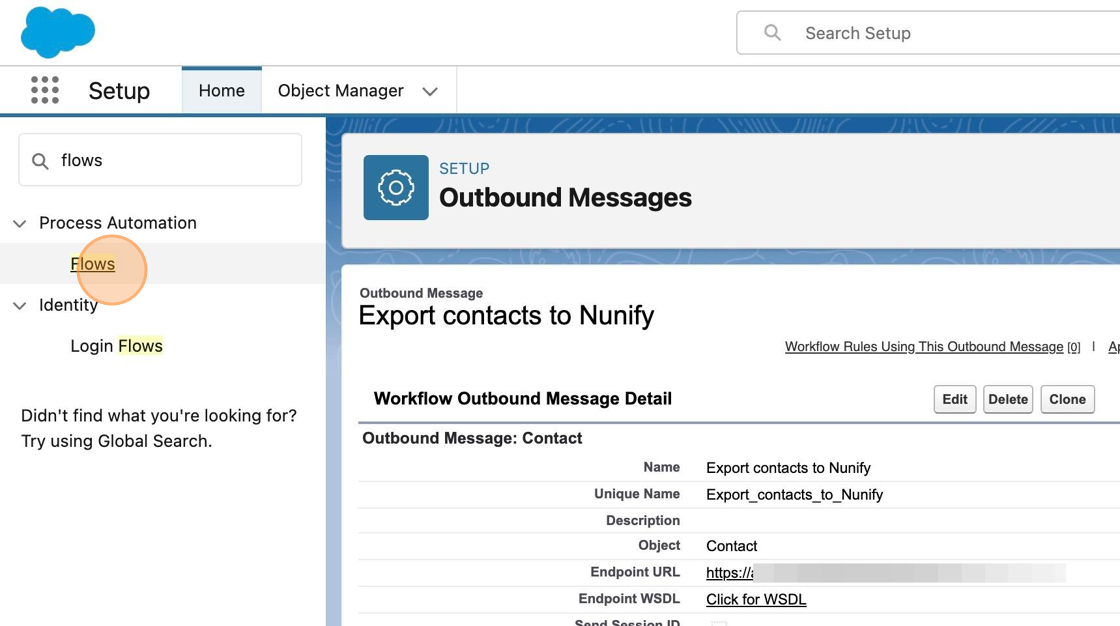
13. Search for flows from Quick Find and click on "Flows" under Process Automation.
14. Click "New Flow"

15. Click "Activate"

16. Select "Record-Triggered Flow" and click "Create"

17. Select "Contact" from the "Object" field

18. Select "A record is created or updated" under "Trigger the Flow When:" and click on Save

19. Enter "Export contacts to Nunify" as Flow Label. The Flow API Name will get filled up automatically. Click "Save"

20. Click on the + button to add a new step

21. Search and select "Action"

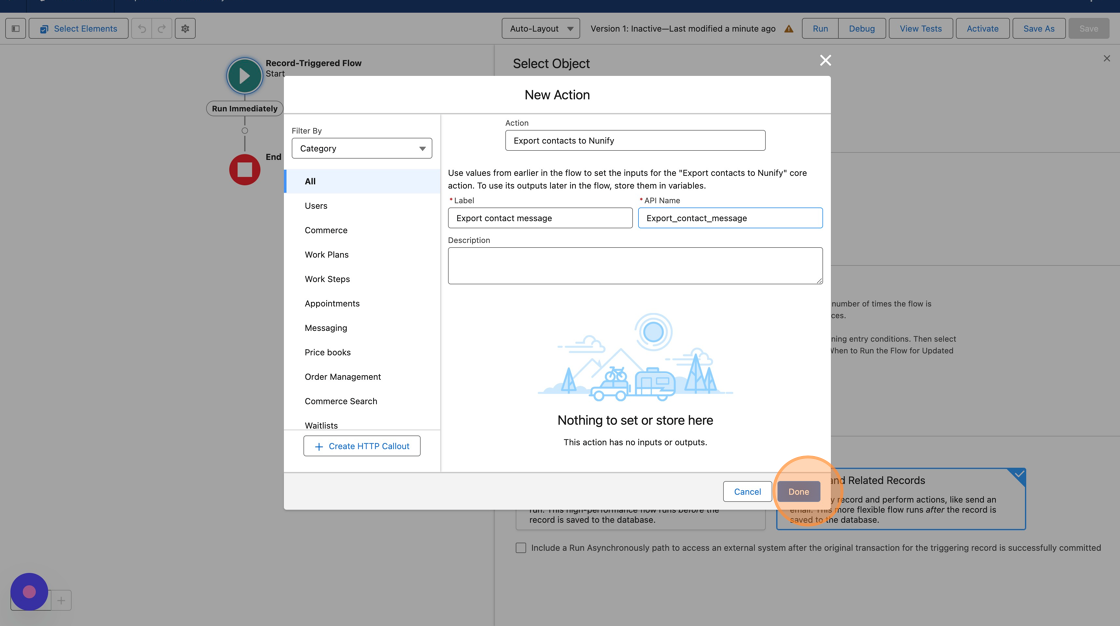
22. Search for "Export contacts to nunify" in Action and select the same

23. Enter "Export contact message" as the label, the API name should get filled up automatically and then click on "Done"
24. Click "Save" to save the flow

25. Click "Activate" to activate the flow.

26. The integration is now setup and any new Contacts added to your Salesforce account will automatically be imported into your Nunify Event.